Full article with thanks to: stuccoitaliano.com/how-to-repair-cracks-in-walls-before-painting
1. How to fix superficial cracks in walls
On the wall, we often find unimportant cracks, such as those due to the phenomenon of shrinkage of the mortar, or to the peeling of the plaster. Despite being superficial, you must repair these cracks in walls before painting or plastering them.
I. Shrinkage cracks
When a mortar made of lime and cement dries, its volume reduces. This leads to a mark that usually looks like multiple cracks, with a central area and many branches. This is a superficial, static crack and won’t cause issues to the application of the plaster. You can simply fill the crack with the same plaster used to fill small holes.
II. Plaster peeling cracks
However, you must first determine that this “spider-web crack” is not a sign of a major problem, such as the beginning of the detachment of a large area of plaster. You can understand this by careful observation. The beginning of a detachment always causes movement around the crack. It is often enough to apply pressure on the crack to see if the plaster moves. For this issue, the only solution is the reconstruction of the plaster.
2. How to repair structural cracks in walls before painting or plastering
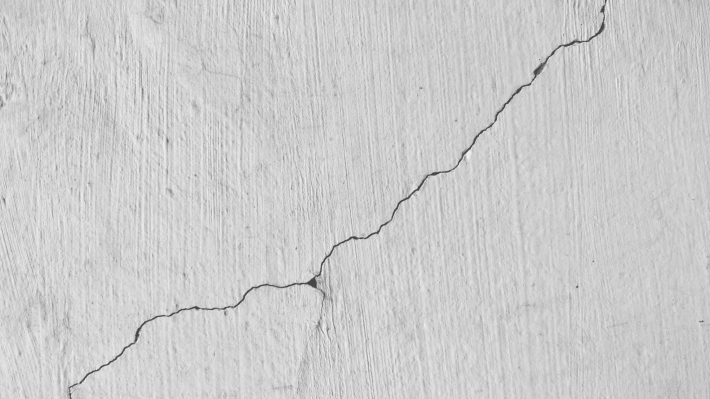
On the other hand, we are sometimes confronted with active cracks. Active cracks are either due to deep breakages inside a wall or to the detachment of a panel in a plasterboard structure. They appear as long, normally vertical cracks. Sometimes, they show the shape of the bricks, highlighting the nature of the problem. Structural cracks, contrarily to superficial ones, are often noticeable on both sides of the wall. These types of cracks are always in motion. Therefore, you definitely have to repair these cracks on walls before painting them, otherwise, the cracks will eventually emerge again.
When the origin of the crack is a detachment of a panel in the drywall structure, it is possible to reestablish the static continuity of the wall. You can do this by screwing back the loose panel into the metal structure. On the other hand, if the crack is caused by breakages at the brick level, its movement can only be stopped by extensive masonry work. However, in both cases, you can create a Mesh Bridge that will permanently prevent the crack from appearing on the finished surface. Read how in the following paragraphs.
I. How to fix deep cracks in a wall
If you have to paint a wall presenting a crack, a solution would be to apply an elastic and over-paintable material inside the crack. Then, apply the paint. Since paints are very thin layers, the material will follow the movements of the crack and will not highlight the problem.
On the contrary, if you have to plaster the wall with stucco or any other material that has its own rigidity, filling the crack won’t be sufficient. In this case, the best solution is to create a “bridge” between the two sides of the crack, so this can move freely underneath without leaving evidence on the surface of the finish.
How to repair cracks using the Mesh Bridge method
To create such a bridge, fix a fiberglass or polyester mesh along the crack with a fiber-reinforced plaster. Then, when it dries, apply your chosen plaster on it. A solution of this type is successful in most cases, especially when the cracks are not too large.
For larger cracks, we recommend a solution that proves successful in about 99% of the cases. First, apply a narrow mesh (about 6 cm) all along the crack with a fibrous plaster. Then, when the plaster dries, apply a wider one (around 30 cm) over it. Make sure you are using the right plaster to fix the mesh to the wall. We recommend a fairly elastic and fibrous plaster, like an Anti-Crack Plaster.
If the wall is full of cracks, the solution is certainly to cover it all with a mesh. First, apply a narrow mesh along the crack. Then, use 100 cm-wide mesh bands, placing them side by side without overlapping them, covering the whole wall.
3. How to repair cracks in floors
On floors, the problem has several facets, but similar solutions. When we plaster a floor, we normally either work on new screeds or old tiles. New screeds must be cured for at least 3 weeks before applying a plaster coating. Indeed, this is the period in which important withdrawals occur, which can determine the formation of cracks.
I. When the floor is a new screed
In this case, the method to repair cracks on the floor is exactly the same as that we have seen for walls. First, apply a narrow mesh along the crack, and fix it to the surface using a fibrous plaster, like an Anticrack. Then, use 100 cm-wide mesh bands, placing them side by side without overlapping them, covering the whole floor.
If the floor surface is a new screed, you can fix the wide mesh bands to the floor with the first coat of the plaster chosen for the final finish. For example, you can use a Pastellone – Venetian Plaster for floors. On the contrary, if the floor is covered by tiles or marble, you should first fix the mesh with a layer of highly fibrous and adhesive plaster, such as a Gap Levelling Plaster – GLP.
II. How to fix cracks in a tiled floor
When you apply plaster over a tiled floor, you should pay particular attention to cracks. Sure enough, tiled floors often present cracks. Nevertheless, they are hardly noticeable, as the crack rarely breaks the marble or ceramic tile. Most often, the crack will follow the tiles running along their edges. Usually, the operator does not notice it until the work is finished, when the crack appears clearly over the plaster.
For this reason, it is advisable to always apply a mesh on all tiled floors before applying a coating. We especially recommend it when you work on floors located above the ground floor, which, in a building, is the most stable one.
The choice of mesh and plaster matters
As for walls, you should use a fiberglass or polyester mesh with a weight of about 120 grams per square meter. The mesh bands should be one meter wide, and you have to place them side by side without overlapping them. Position the mesh over the tiles and fix it with the first coat of plaster. A Gap Levelling Plaster (GLP) is the ideal plaster to incorporate the mesh and adhere to the tile.
Both in walls and in floors we will always have to respect the possible expansion joint, which is not easy to hide under a mesh. Just place the mesh at the sides of the expansion joint, leaving it uncovered by either mesh or plaster.
4. Cracks that require major masonry or reconstruction work
Occasionally, you’ll also find cracks for which nothing can be done but to rebuild the masonry structure correctly.
For example, the crack in this fireplace hood was created by the expansion of the internal metallic hood, on which the masonry structure had been mistakenly attached. The metallic hood and the bricks have two different responses to the sudden increase of temperature in the fireplace, resulting in cracks on the brickwork when this is leaning on the hood. The only solution we found was to cover the fireplace hood with a plasterboard, gluing it with a flexible material. Then, we re-applied our Venetian Plaster over it.
Plaster Crack Repair Products
If you need to repair a crack on a wall before painting it or plastering it, you should use adequate products. Here’s the list of the crack repairing products we recommend using.
AntiCrack
It is a flexible plaster for interiors and exteriors. It reduces the risk of cracking on drywall and other plasters and considerably improves the impact resistance and durability of drywall construction. Anticrak is essential on drywall and on old plaster restorations. This is the ideal substrate for lime and gypsum plasters. You can use Anticrack also to repair structural cracks in walls before painting or plastering. First, apply a narrow fiberglass mesh tape (about 6 cm) all along the crack. Then, fix the mesh to the surface with a layer of Anticrack. Subsequently, when the plaster dries, apply a wider mesh tape (around 30 cm) over it, fixing it with Anticrack.
Gap Levelling Plaster
It is plaster with an extreme adhesion capacity, that doesn’t shrink when it dries off. Because of this quality, we use it to fill gaps between tiles in walls and floors, before applying plasters. Because of its adhesion capacity, you can use it as a first coat for plastering on tiles and marble, without sanding them first. You can a Gap Levelling Plaster to repair cracks on tiled floors. First, cover the entire tiled floor with 1m-wide fiberglass mesh tape. Place the bands side by side without overlapping them. Then, fix them to the surface with Gap Levelling Plaster (GLP). Finally, when it dries, apply your desired plaster to it.
Full article with thanks to: stuccoitaliano.com/how-to-repair-cracks-in-walls-before-painting
Did you enjoy that? Why not share this article.
Get useful painting and decorating information on our advice blog. If you want a professional to take care of your painting and decorating, we’re painting and decorating specialists! Learn more about our services here.