Full article with thanks to: thisoldhouse.com/painting/21015129/24-tips-for-painting-trim-and-walls
Ask just about any painting pro, and he’ll tell you that his trade has a real image problem. After all, everyone thinks they can paint—just watch how fast the colour goes up on those done-in-a-day home-makeover shows. Grab a brush, a roller, and a couple of gallons of latex, and you’re all set, right?
Not quite. “The truth is, it is easy to do things poorly,” says Rich O’Neil, who chairs a craftsmanship committee within the Painting and Decorating Contractors Association of America. There’s no substitute for learning the proper steps, taking time to do the job right, and improving your technique as you go.
24 Pro-Tips to Help You Paint Trim and Walls
But there are also a few tricks of the trade that homeowners can learn to ease the way. We’ve assembled a couple dozen of them on the following pages, gleaned from decades’ worth of accumulated wisdom from pros working from Seattle to Boston. Put their pointers to work, and you’ll notice a difference in your paint job years after the tape and tarps are put away.
Prepare for Your Paint Job
1. For A Bigger, Better Swatch, Get a Paint Sample
Don’t expect a thumbnail-size colour chip from the paint store to give you a sense of how a colour will look on the walls. Colours are relative to one another and the objects around them—like, say, that new leather sofa. Instead, make your own mega switch.
Get a sample quantity of paint, brush two coats on a slab of foam core (its white surface acts like a primer) at least three feet square, then put it up against the wall. You’ll get a much better sense of how your tint plays off your furniture and flooring. Eyeball the colour at various times of the day and move it around the room to see how it looks in different light conditions.
2. How Many Paint Cans Do You Need?
Before you set out for the paint store, take a tape measure and figure out how much surface you need to cover—and don’t forget the ceiling. Measure the longest wall, and square that number for the ceiling.
For the walls, multiply the length of the longest wall by its height, then multiply that number by four. Double your numbers if you’re doing two coats. Or follow these steps to calculate how much you need; as a rule of thumb, one gallon covers about 400 square feet.
3. Invest in Premium Paint
Go for the good stuff. Why? Because cheap paint covers very well when it’s wet—the first, and in many cases, last, time many people scrutinize their work—but not so well once it’s dry.
“There is only room for a gallon’s worth of stuff in the can,” says Seattle-based painter Doug Wold, owner of Queen Anne Painting. “If you add more cheap pigment, you take out more expensive resin—and that’s what holds it together.” Always apply two coats, and allow 2 to 3 hours between them.
4. No Muss, No Dust
Painting prep usually involves scraping, sanding—and dust-making. “You might be shocked at how far dust travels, and what small areas it can get into,” says Rich O’Neil, owner of Masterwork Painting, in Bedford, Massachusetts.
If you don’t want to invest in a spring-loaded-pole-style barrier system like that made by ZipWall, put plastic up around doorways that lead to the work area and over furniture. Skip the flimsy stuff: Clear, heavier-gauge sheeting (2 to 4 mil) is reusable, easier to fold and unfold, and less likely to rip. Secure it with painter’s tape.
5. A Clean Sweep
Many of us are so anxious to get the paint up that we don’t take the crucial first step of thoroughly cleaning the walls—especially in the kitchen, where they may be invisibly decorated with grease, oil, and food residue.
“If you don’t clean that off, you could be painting a greased cookie sheet,” says Doug Wold. “It ain’t gonna stick.” The same goes for the bathroom, the domain of airborne shampoo, hair spray, and cosmetics. Use a degreaser on tough areas; household cleanser should work elsewhere. Then rinse.
6. How to Paint Baseboard with Carpet
If you have to paint baseboards over a carpet there are a few ways you can approach it. First, check to see if you might be able to remove the carpet’s tack strip and pull it back. If that’s not possible, you’ll likely need to paint with everything in place. You can use a carpet shield or paint shield to protect the carpet while painting. Alternatively, a more involved option is to remove the baseboard, paint it, then re-install it afterwards.
Assemble Your Tools
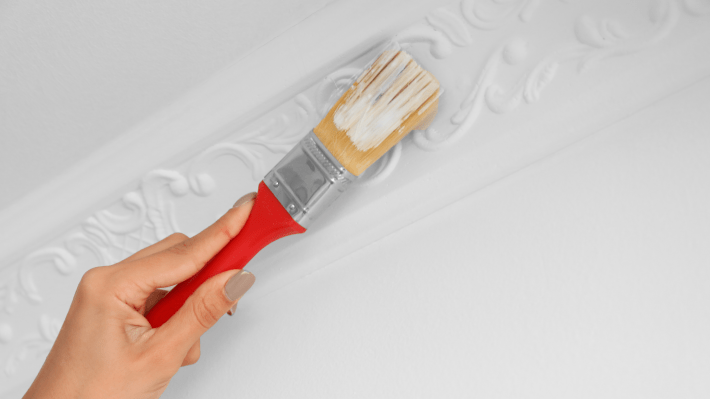
7. The Mark of a Good Brush
Bristles should be “flagged”: tapered, split, and arranged in multiple lengths to form a slim tip. Synthetic ones—especially a mix of nylon and polyester, like DuPont’s Chinex—hold and release latex paints exceptionally well.
Pro2ProTip: It’s best to reserve natural bristles for oil-based finishes; water-based paints make them swell and lose their shape.
Unfinished hardwood handles are easier to grip with sweaty hands, and copper or stainless-steel ferrules won’t rust after you’ve washed the brush. You’ll want at least one 21/4-inch angled sash brush for cutting in trim and one 3-inch brush for cutting in walls and ceilings.
Buy the best ones that you can find—a good brush will generally run you £12 to £15. “People think nothing of spending $10 to go to a movie,” says John Hone, owner of Hone Painting and Restoration in Caldwell, New Jersey. “But they put themselves through torture trying to paint with cheap equipment.”
8. Roller Size Matters
Your local home centre or hardware store offers lots of standard 9-inch roller cages and covers for painting walls, but they’re not the only size to consider.
Small foam rollers are good for door panels and wainscoting, and 14- and even 18-inch rollers hold enough paint to allow you to cover a lot of areas faster—handy if you have a high-ceilinged great room to get colour on.
“Manufacturers make larger rollers, and there are people buying them,” says Chicago’s Mario Guertin, president of Painting in Partnership. “But only the educated ones.”
9. A Better Sandpaper
Look for black sandpaper coated with silicon carbide—it won’t gunk up as quickly as the standard-issue brown kind, so it’ll last longer.
Foam sanding sponges covered with the same stuff allow you to sneak into corners and evenly wrap-around rounded trim—plus, they’re reusable. Just wring them out in the water to clean them, then use them damp to trap more of the dust.
Which grit to pick? Use a medium grit (100 or 120) when you’re prepping walls that are already in decent shape; a coarser 60 or 80 grit to take the edges off paint that is chipped or peeled. Very fine (200 or 220 grit) sandpaper is best for smoothing surfaces between coats of paint.
Painter’s Tape Tips
10. Let It Be Your Guide
Pros use miles of low-tack blue painter’s tape—mainly to protect surfaces, but also as a guide for cutting in walls or ceilings. “With older houses, flat surfaces can be so uneven you can’t be sure you are getting a crisp line if you paint over tape,” says Hone. “So just use it as a guide.”
Cut in up to the edge of the tape, but don’t cross over it. Bring your fully-loaded brush within about 2 1/4 inches of the tape, but go very light on that last 1/4 inch closest to the tape. “When you do that, you have a fighting chance that the paint won’t wick under the tape’s edge,” says Hone.
11. The Perfect Stripe
Like the look of painted stripes? To put on a crisp band of colour without any bleed, first lay down a line of blue painter’s tape, then run a small bead of latex caulk over the edge where the two colours will meet.
“Wipe down the caulk until you have a very thin layer on the wall,” says Portland, Oregon, painting contractor Dave Siegner. “Then peel off the tape, and paint up to the line of caulk.” The thin bead will seal off the dry surface better than any tape. A few hours later, peel off the caulk.
12. Score It
If you’ve masked off baseboards with painter’s tape, pull it off the same day as you apply the paint—but run a blade along with it first, says Siegner. “Sometimes latex wall finishes are rubbery until they cure completely, and if they’re touching your tape you can pull away from a piece of the paint from the wall when you go to remove it,” says Siegner.
Score the edge of the tape between the top of the baseboard and the wall with a putty knife held at a 45-degree angle.
Teaming Up with a Pro
13. Halfway Measures
If your budget is tight—and your painting skills are decent—ask a painting contractor if he would willing to talk about splitting the job with you. Brandt Domas, the owner of Domas Fine Painting in Denver, Colorado, occasionally enters into such partnerships with homeowners.
“We may go in and strip the trim, then people will do the painting themselves,” he says. “Or we may go in and do the prep repairs, or the high areas. We don’t always have to say ‘It’s all or nothing.'”
14. A Little Help Here?
Pros always work with “wet edges.” Meaning they roll walls before the areas where they’ve cut in—or painted with a brush along the wall’s perimeter edges—have dried.
“It’s best to have one person cutting in and another rolling wall right behind her to avoid ‘banding’ around the edges of a room,” says painting contractor Jim Clark, who’s worked on many This Old House TV projects.
If you can’t lean on a buddy to help and you’re working alone, try to cut in only as much as you can roll while the paint remains wet.
Smoothen Out the Walls
15. Bust the Fuzz
There’s nothing more frustrating than seeing little squiggles of lint embedded in your freshly painted walls. To keep them at bay, wrap your hand in painter’s tape—sticky side out—and pat down new roller covers to catch any stray fibres.
16. Glob Patrol
Never dip the roller so far into the paint that the roller arm gets wet—this is a recipe for drips. And at the start of each workday, strain your paint into a clean bucket, even if you’ve sealed the lid tightly overnight. “If you skip this step, you end up with coagulated pieces of paint—we call them boogers or snots—on the walls,” says Mark Casale of Hingham Painting and Decorating in Massachusetts. And nobody wants that.
17. Give Walls the Once-Over
To trap sanding dust on trim, you probably already know to run tack cloth—essentially, cheesecloth embedded with sticky resin—over it. But it’s also a good idea on walls. “I wrap tack cloth over the head of my pole sander and run it over the wall surfaces to pick up the dust,” says John Dee, a painting and decorating contractor based in Concord, Massachusetts.
Most hardware and paint stores carry tack cloth, but if you don’t have one, use a Swiffer or a microfiber dusting cloth instead. It’s not a bad idea to vacuum walls with a soft brush attachment, as well. Just be sure the vacuum has a HEPA filter to keep the dust from recirculating back into the room—and back onto your walls.
Paint Your Wall and Trim Properly
18. Do you Paint Trim or Walls First?
Many homeowners paint the walls first, then move on to the trim while they wait for the first coat to dry. Homeowners should think more strategically, says Rich O’Neil of Masterworks Painting. “Paint all the woodwork first—the first and second coats—then move onto the walls,” says O’Neil.
“If you toggle back and forth, your cutlines won’t be as sharp. When you do the woodwork first, you can ride the trim paint onto the walls a little, then cut over it in one go.”
19. Evenly Apply Your Coats
When applying your coats, don’t just focus on coverage, think about a uniform thickness as well. “Homeowners think that pro painters put on colour, but they actually put on texture,” says Doug Wold of Queen Anne Painting.
On woodwork, align your strokes to follow the grain. Try to avoid “fat edges”—the goopy cornices of paint that can hang over the edges of a door—and rope marks left by overloaded rollers. “If you don’t hold the roller uniformly against the wall, it can leave a ridge—just like on a ski hill, when groomers leave little ridges between their tracks.”
20. Laying Off with Long Vertical Strokes
After you’ve rolled a section of the wall, make a series of long vertical strokes—moving in one direction, left or right—up the full length of the wall. This last step, called “laying off,” distributes the wet paint across the surface in a nice even layer.
21. How to Load a Brush
Good bristles pull paint up toward the top of the brush and the metal ferrule. To keep from overloading your brush, dip the bristles no more than halfway into the bucket. Then gently tap the bristle ends against both sides of the bucket to remove any excess. Or do as Mark Casale of Hingham Painting and Decorating does. “Dedicate half of the pot as your ‘wet’ side, using the handle as an imaginary dividing line.” Tap one side of the brush on this side of the bucket, then turn the brush untapped-side up.
To get the paint on the wall, Casale recommends setting the brush a few inches away from where you’re cutting in, then moving it into the cut line and drawing it straight up until the brush starts to drag. Then draw it back down in a line to level it out. Finally, move the brush upward with a light stroke to “tip-off,” smoothing out any brushstrokes.
Clean Sweep
22. Clean Up Accidental Drips
Should you accidentally drip water-based paint on your carpet, do not try to scrub it—the fastest way to embed the colour in the fibres of the carpet. Instead, “keep the area wet, and blot it up,” says Tracey Kidd, of Kidd Painting in Mesa, Arizona.
“If you spill a lot, blot up as much as you can, dampen the area, and call a carpet-cleaning company.” If you keep the spot wet, a professional carpet cleaner should be able to get the whole spill up.
23. In Praise of the Comb-Over
A thoroughly cleaned brush will see you through more renovations than even the strongest marriage might endure. Thoroughly wash your brush, immediately after painting, with mild soap and warm water. Then, under the running faucet, draw a metal brush comb through the bristles to pull paint from the core and away from the metal ferrule.
Got some stubborn paint on the outside of the brush? Skip wire brushes, which can damage delicate bristles, and grab a nylon scrubbing pad from the kitchen sink to loosen it.
24. Clean Your Brush Properly
The pros call a worn-out brush a “club,” which is about as precise as it sounds. “If your brush is worn-out, or flared, it isn’t any good,” says Patrick Dallaire of August West and Company in Portland, Oregon.
When pros clean their brushes, they pat them dry, spin out excess moisture by rubbing the handle between their palms, then put them back in their original packaging to maintain their shape. Says Dallaire: “If you’re maintaining your grip—what we call a painter’s toolbox—you’re ahead of the game.”
Paint Color Selection
Picking the Right White
The single most popular paint colour in the world might also be the most confounding. One problem is that there are just so many variations of the hue. But don’t assume they’re all the same. “If I were to lay some whites down side-by-side, you would immediately be able to see the differences,” says Ken Charbonneau, owner of Color Marketing Consultants in New York City.
“The first step in picking a white is deciding whether you want a warm white or a cool one. Warmer shades of white incorporate an undertone of yellow—think French vanilla ice cream—or a touch of rust, pink, or brown. Cooler whites, on the other hand, suggest a hint of blue, green, or grey. Choose one or the other based on the existing tones most prevalent in a room.” Take a look at your brown-leather sectional, or your cherry floors, or your oriental rug,” he says. “These things are there, don’t ignore them.”
More often than not, people lean to the warmer whites, which far outsell their crisper cousins. That said, there are those who prefer a cleaner, more modern white, says Becky Spak, a colour-marketing specialist with Sherwin-Williams (a range of the company’s whites are shown at right). “Maybe they have a lot of stainless steel or a more modern urban-loft look. Those are the folks who usually look to the cleaner, cooler whites.”
Repeat the Process with Any Other Color
Once you have the tonal family established, follow the same rules as any other colour: Choose two or three shades, put up a row of sample swatches—be sure to do two coats of each, advises Spak—and eyeball them during the day and at night, with the lights on. Then go with your gut; odds are, one of your choices will either soften or complement the givens in the room.
Finally, consider staying ultra-stark on the often-overlooked surface overhead. A white with little or no undertone, or at most a slight grey cast, creates a neutral “sky” above and visually lifts the ceiling height. Says Charbonneau, “That’s really the place for the whitest white of them all.”
Decoding the Strip Chip
That’s what that narrow row of darker-to-lighter shades of one colour is known as in the trade. The darkest shade anchors the card, then it is “let down” into lighter versions that contain less colour pigment and more pure white.
So how come some colours start to look redder or bluer or somehow different as the shades get lighter? “That’s really a trick of the eye,” says Carl Minchew, director of colour technology for Benjamin Moore. “It’s your perception of the colour that changes. The colour pigment remains the same.”
Colour perception is influenced by several factors, including the quality of the light around you (is it yellowish incandescent light or bluer fluorescent light?) and the “simultaneous contrast” factor—what other colours surround the one you’re looking at? A white background will make the very vibrant yellow look less bright but more intense. Against a mahogany surface, the same colour will look lighter and brighter.
Paint colours tend to appear more intense on the wall than on a tiny little rectangle of paper, so the strip chip does allow you to preview what a deeper value might look like. And if you’re nervous about a given colour, going one step lighter can be a safer bet—you’ll probably get something in between once it’s up on the wall.
If you’re really at a loss, try this: Find a strip where you can live with the darkest-colour chip; then you know you’ll like the colours at the middle and the top of the range.
Tips from the Paint Doctor
Bruce Schneider knows paint. He worked as a pro for 12 years before taking over training for brush maker Purdy 17 years ago—and in his spare time heads up the apprenticeship program of the Finishing Trades Institute.
Here are a few tricks he’s learned along the way:
- To prevent paint spray on baseboards when rolling walls, wipe them down with a wet rag to keep spatter from sticking. When you’ve finished rolling, run the damp rag along baseboards once more to wipe away any droplets.
- Breathe out or hold your breath while cutting along the trim or where walls meet—”It’ll help you keep a straight line.” Up high, be sure to stand squarely on your ladder instead of overreaching.
- When cutting in on textured walls or ceilings, vibrate your hand a little to get bristle tips into uneven surfaces.
- To avoid fatigue, switch hands when cutting in—think of the brush as an extension of your arm. And don’t push too hard when you’re rolling.
- Finally, don’t run your brush or roller dry. “When you can see through the paint—what painters call ‘holidays’—you’ve gone too far.”
Full article with thanks to: thisoldhouse.com/painting/21015129/24-tips-for-painting-trim-and-walls
Did you enjoy that? Why not share this article.
Get useful painting and decorating information on our advice blog. If you want a professional to take care of your painting and decorating, we’re painting and decorating specialists! Learn more about our services here.