Learn what it takes to be a cutting in pro with these simple techniques!
Full article with thanks to: diydoctor.org.uk/projects/cutting-in-before-painting.htm
Cutting in is a skill that will save you time and improve the finish of any painting job. We explain the best techniques for getting a crisp clean line between the walls you are painting and the ceiling or skirting boards that you aren’t. We also cover a few tips and tricks to make sure that you get the best possible finish with the least time and effort. With a little practice, you will be cutting in like a pro!
“Cutting in” is the technique of painting a straight line and border of paint on the wall that you are about to paint, and only on the wall. Apparently it is called “Trimming In” in North America, but the techniques are exactly the same.
There are a number of reasons that you would cut in before painting:
- When painting a wall you are going to be using a roller, more probably or possibly a paint pad. If this is the case it is imposible to paint into the corners and the joint between the wall and ceiling for example
- It is much quicker that masking up the skirting boards and ceiling to ensure that no paint get on them. It is the only practical way to make sure that the paint stays only on the wall you are painting if you have a lot to paint
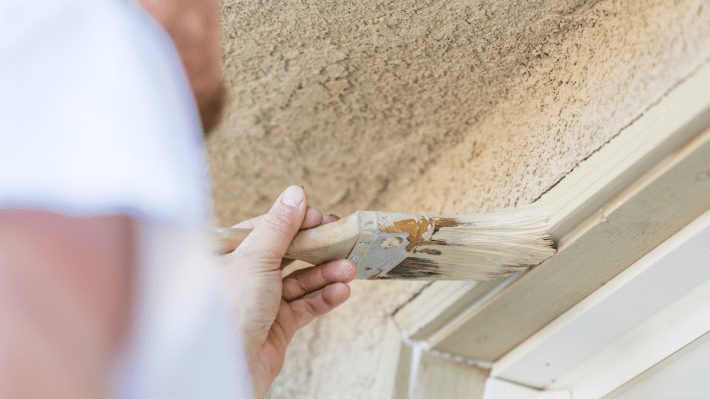
- You will get a really crisp, clean line where the paint from the wall ends – if done right!
When to Cut In on a Painting Project
You should cut in just before you paint. Ideally if there are two of you painting, the second person should follow you so that youe cut-in blends into the paint for the whole wall, which is much easier to achieve when the paint is not dry.
Since the cutting takes place just before you do the actual painting, it is important that you have parepared the walls ready for painting. For more detailed information about what you should have done have a look at our project explainting what is needed to prepare a wall or ceiling for painting.
As a a quick reminder, here are some of the more important tasks that you probably need to get done before cutting it:
- Move all the furnature and pictures that might get in the way
- Laydown all the necessary dust sheets that you need
- Clean, fill and sand the walls so that they are smooth and ready
- You might need to consider a mist coat (a watered down emulsion)
- Mask up any feature that you cannot afford to get paint on
- Remove anything from the wall that you can, including radiators, lights fitings and switches
- Get a good cutting in brush – it doesn’t pay to go cheap here
You should always cut in before you paint the rest of the wall, because if you do it the other way around you are more likely to get a boarder effect around the edges of the walls where you have cut in. The roller will leave a slightly stippled effect, which a brush will not.
By painting on top of the cutting in you can fade into the cut in paint. Some professionals advocate using a small roller as part of your cutting in process to take the roller effect as close to the corner as you can reasonably achieve – (See more below).
The next step is to confirm where you need to cut in.
Where to Cut In when Painting
You will need to cut in all around the wall (or walls) that you are painting – every edge. You will also need to cut in along the corners where one wall meets another, even if you are going to paint both walls. This is because the roller will not get in there and give a complete covering of paint.
It is important to cut into every edge because this will give you a crisp and sharp line, which a roller will not be able to achieve. This is the case even if you have masked up the skirting boards and the switches.
How to Cut In and the Tools You Need
The concept is very easy, but in practice is it much harder and it takes a great deal of concentration to cut in neatly.
The secret is to have a good quality cutting in the brush. Many professionals prefer an angled sash brush as this allows them to get right into the corner, but it is really up to personal preference. We would suggest a decorator’s brush, ideally with synthetic bristles.
The only other bit of kit you might need (other than the paint!) is a small roller; a 4-inch roller should be about right.
The nap (woolliness of the roller) should be the same or similar to the larger roller that you are going to be painting the rest of the room with. This is so that you can “finish” the cut-in area with it and age a very similar stippled effect as the larger roller will leave. This will ensure that the cut in the area is not visible.
Mix, stir or shake your paint so that it is ready to be used. Next, you will need to load your brush; this is why you need a good quality brush so that you do not overload it and it will hold its shape.
It is a good idea to start in a corner or somewhere is doesn’t matter too much if you don’t get a perfect line. You need to work the brush-up and down the corner to work the paint into the middle of the brush so that when you come to paint your straight line between the edge of the wall and the ceiling, the brush has the paint to release.
You only need to use the bottom third of the brush. Try not to get paint all over it and do not overload it.
You should hold the brush in a similar way a table tennis player holds his bat. Use your index finger against the thin side of the bristles to give you even more control – this is all about precision. Make sure you’re comfortable as you shouldn’t be straining to hold the brush.
When your brush is loaded then you need to apply it to the wall. Start a couple of cm (approximately an inch) from the corner you are cutting into and gradually, smoothly and confidently draw the brush along the line of the corner, moving towards in until you are painting a crips line along with it.
You will need to come back the other way, so don’t get to concerned if there are gaps or it’s not perfect. One clean, single movement is all that it required.
Then you should recharge your brush if necessary and then come back on the opposite stroke. This should fill any gaps caused by any bumps and finish with a nice clean line.
At this stage it is not worth worrying too much if it is not perfect. Don’t waste your time, as you ought to come back for a second coat anyway and you will pick up any gaps then.
At this point is it worth using your small (4 inches) roller to roll out the paint that you have cut in. This will make the joint between the rest of the painting more seamless and prevent any “border effects” where the two join.
You now need to work your way methodically around the room, working on about 12-18 inches at a time.
Cut in to every edge, including all ceilings, skirtings and architraves.
If you have a narrrow gap between the ceiling and the door, you might as well paint this while you are there as it will be easier that trying to weild a large roller into this gap.
You will probably need to come back for a second coat so don’t rush and don’t worry about gaps and imperfections. The second coat will pick these up.
As we have mentioned, if you can, it is a good idea to try and paint the room while your cutting in paint is not yet dry as this will allow you to taper in the two paint effects more easily.
Don’t worry if you can’t because with the techniques we have shown you this will not be a problem anyway.
Full article with thanks to: diydoctor.org.uk/projects/cutting-in-before-painting.htm
Did you enjoy that? Why not share this article.
Get useful painting and decorating information on our advice blog. If you want a professional to take care of your painting and decorating, we’re painting and decorating specialists! Learn more about our services here.